Showing posts with label Audio-video. Show all posts

Sunday, October 21, 2018

Hidden Features of VLC

1. Download YouTube Videos
  1. Find a video on YouTube—like this one—and copy the URL from the address bar.
  2. In VLC, head to Media > Open Network Stream.
  3. Paste the YouTube link in the box and click Play.
  4. Under Tools, click Codec Information.
  5. In the box that says Location, right-click the block of text and click Select All. Copy this text to your clipboard.
  6. Go back to your browser and paste the link in the address bar. This will open the source file directly on YouTube's servers.
  7. Right-click the video as it plays and select Save Video As.
You can also record clips from YouTube videos as they're streaming in VLC by pressing the red Record button in the player itself. This isn't as direct of a rip, but it's handy if you need to grab a particular clip out of a long video.

2. Record Your Desktop

  1. Under Media, click "Open Capture Device."
  2. Click the "Capture Mode" dropdown and select "Desktop."
  3. Modify the frame rate. 15 f/s will probably be good enough for desktop recording, though 30 may be required for more fast-paced movement.
  4. Click the dropdown arrow next to "Play" and select "Convert."
  5. In the "Profile" dropdown, choose MP4.
  6. At this step, you can click the tool icon to modify the settings of this profile. Here you can modify things like resolution or bitrate. We'll use the default settings for now, but you can come back here later if you need to tweak the final product.
  7. In the Destination box, choose a location to place the finished file.
  8. Click Start.
Once you click Start, VLC will stream a feed of your desktop into itself behind the scenes. Let it run while you record your workspace. When you're done, you can click the stop buton in the player controls to end recording.

3. Convert Video Files
  1. Under Media, click "Convert/Save."
  2. Add the file you want to convert in the File Selection section.
  3. Click "Convert/Save."
  4. In the Settings section, choose the type of file you want to convert the file into under Profile.
  5. Give the file a name and location under Destination.
  6. Click Start.
The converted video file will be deposited in the target location. VLC certainly isn't a replacement for a more robust application like Handbrake. However, for simple jobs, it's probably the only video converter most people have on their machines.

4. Record Your Webcam
  1. Under Media, click Open Capture Device.
  2. In the "Capture mode" drop down, select DirectShow.
  3. For "Video device name" choose your webcam.
  4. For "Audio device name" choose your microphone.
  5. Click "Advanced options."
  6. If you want to use the software that came with your device to control input settings, choose "Device properties."
  7. Otherwise, enter a value for "Video input frame rate." 30 is a good rule of thumb for smooth video, though you can use less if you're not concerned about quality.
  8. Click Okay.
At this point, you have two options. You can click Play to play live video through VLC and record segments as needed by pressing the red Record button. Alternatively, you can choose "Convert/Save" from the dropdown and select where you would like the recorded file to go. Both methods have their advantages. The former allows you to preview your video and take clips in short bursts. However, this method requires headphones, as it can create a feedback loop. It also may cause a more sluggish recording on slower computers. Using the Convert/Save method avoids the feedback problem but it also doesn't provide you much information on what you're looking at or when you're done recording. You can stop the recording by pressing Stop in the player, but there's no indicator that you are still recording at the time.
5. Subscribe to Podcasts

 To add a podcast, you'll need the RSS feed of the show. As an example, we'll use Lifehacker alum Adam Dachis' Supercharged podcast here. The RSS link will probably look something like this:
http://feeds.5by5.tv/supercharged
Once you've found the RSS feed for the podcast you want to keep up with, follow these steps:
  1. In VLC's sidebar, scroll down until you see Podcasts.
  2. Hover your mouse over Podcasts and click the plus sign on the right.
  3. Paste the RSS feed URL of the show you want to add.
  4. Click OK.
Now, your podcast of choice will appear in the Podcasts sidebar section. Click on the name of a show and you'll see a list of available episodes. Double click on any one of them to start streaming.
Source: https://lifehacker.com

Monday, October 15, 2018

20 FFmpeg Commands For Beginners

In this guide, I will be explaining how to use FFmpeg multimedia framework to do various audio and video transcoding, conversion operations with examples. I have compiled most commonly and frequently used 20 FFmpeg commands for beginners. Let us get started, shall we? If you haven’t installed FFmpeg yet, refer the following guide.

20 FFmpeg Commands For Beginners

The typical syntax of the FFmpeg command is:
ffmpeg [global_options] {[input_file_options] -i input_url} ...
 {[output_file_options] output_url} ...
We are now going to see some important and useful FFmpeg commands.
1. Getting audio/video file information
To display your media file details, run:
$ ffmpeg -i video.mp4
Sample output:
ffmpeg version 3.3 Copyright (c) 2000-2017 the FFmpeg developers
 built with gcc 6.3.1 (GCC) 20170306
 configuration: --prefix=/usr --disable-debug --disable-static --disable-stripping --enable-avisynth --enable-avresample --enable-fontconfig --enable-gmp --enable-gnutls --enable-gpl --enable-ladspa --enable-libass --enable-libbluray --enable-libfreetype --enable-libfribidi --enable-libgsm --enable-libiec61883 --enable-libmodplug --enable-libmp3lame --enable-libopencore_amrnb --enable-libopencore_amrwb --enable-libopenjpeg --enable-libopus --enable-libpulse --enable-libschroedinger --enable-libsoxr --enable-libspeex --enable-libssh --enable-libtheora --enable-libv4l2 --enable-libvidstab --enable-libvorbis --enable-libvpx --enable-libwebp --enable-libx264 --enable-libx265 --enable-libxcb --enable-libxvid --enable-netcdf --enable-shared --enable-version3
 libavutil 55. 58.100 / 55. 58.100
 libavcodec 57. 89.100 / 57. 89.100
 libavformat 57. 71.100 / 57. 71.100
 libavdevice 57. 6.100 / 57. 6.100
 libavfilter 6. 82.100 / 6. 82.100
 libavresample 3. 5. 0 / 3. 5. 0
 libswscale 4. 6.100 / 4. 6.100
 libswresample 2. 7.100 / 2. 7.100
 libpostproc 54. 5.100 / 54. 5.100
Input #0, mov,mp4,m4a,3gp,3g2,mj2, from 'video.mp4':
 Metadata:
 major_brand : isom
 minor_version : 512
 compatible_brands: isomiso2avc1mp41
 encoder : Lavf57.22.100
 Duration: 00:43:18.69, start: 0.000000, bitrate: 1039 kb/s
 Stream #0:0(und): Video: h264 (High) (avc1 / 0x31637661), yuv420p, 1280x714 [SAR 1071:1072 DAR 120:67], 899 kb/s, 23.98 fps, 23.98 tbr, 24k tbn, 47.95 tbc (default)
 Metadata:
 handler_name : VideoHandler
 Stream #0:1(und): Audio: aac (LC) (mp4a / 0x6134706D), 48000 Hz, stereo, fltp, 132 kb/s (default)
 Metadata:
 handler_name : SoundHandler
At least one output file must be specified
As you see in the above output, FFmpeg displays the media file information along with FFmpeg details such as version, configuration details, copyright notice, build and library options etc.
If you don’t want to see the FFmpeg banner and other details, but only the media file information, use -hide_banner flag like below.
$ ffmpeg -i video.mp4 -hide_banner
Sample output:

See? Now, it displays only the media file details.
2. Converting video files to different formats
FFmpeg is powerful audio and video converter, so It’s possible to convert media files between different formats. Say for example, to convert mp4 file to avi file, run:
$ ffmpeg -i video.mp4 video.avi
Similarly, you can convert media files to any format of your choice.
For example, to convert youtube flv format videos to mpeg format, run:
$ ffmpeg -i video.flv video.mpeg
If you want to preserve the quality of your source video file, use ‘-qscale 0’ parameter:
$ ffmpeg -i input.webm -qscale 0 output.mp4
To check list of supported formats by FFmpeg, run:
$ ffmpeg -formats
3. Converting video files to audio files
To convert a video file to audio file, just specify the output format as .mp3, or .ogg, or any other audio formats.
The above command will convert input.mp4 video file to output.mp3 audio file.
$ ffmpeg -i input.mp4 -vn -ab 320 output.mp3
Also, you can use various audio transcoding options to the output file as shown below.
$ ffmpeg -i input.mp4 -vn -ar 44100 -ac 2 -ab 320 -f mp3 output.mp3
Here,
  • -vn – Indicates that we have disabled video recording in the output file.
  • -ar – Set the audio frequency of the output file. The common values used are  22050, 44100, 48000 Hz.
  • -ac – Set the number of audio channels.
  • -ab – Indicates the audio bitrate.
  • -f – Output file format. In our case, it’s mp3 format.
4. Change resolution of video files
If you want to set a particular resolution to a video file, you can use following command:
$ ffmpeg -i input.mp4 -filter:v scale=1280:720 -c:a copy output.mp4
Or,
$ ffmpeg -i input.mp4 -s 1280x720 -c:a copy output.mp4
The above command will set the resolution of the given video file to 1280×720.
Similarly, to convert the above file to 640×480 size, run:
$ ffmpeg -i input.mp4 -filter:v scale=640:480 -c:a copy output.mp4
Or,
$ ffmpeg -i input.mp4 -s 640x480 -c:a copy output.mp4
This trick will help you to scale your video files to smaller display devices such as tablets and mobiles.
5. Compressing video files
It is always better to reduce the media files size to lower size to save the harddisk’s space.
The following command will compress and reduce the output file’s size.
$ ffmpeg -i input.mp4 -vf scale=1280:-1 -c:v libx264 -preset veryslow -crf 24 output.mp4
Please note that you will lose the quality if you try to reduce the video file size. You can lower that crf value to 23 or lower if 24 is too aggressive.
You could also transcode the audio down a bit and make it stereo to reduce the size by including the following options.
-ac 2 -c:a aac -strict -2 -b:a 128k
6. Compressing Audio files
Just compressing video files, you can compress audio files using -ab flag in order to save some disk space.
Let us say you have an audio file of 320 kbps bitrate. You want to compress it by changing the bitrate to any lower value like below.
$ ffmpeg -i input.mp3 -ab 128 output.mp3
The list of various available audio bitrates are:
  1. 96kbps
  2. 112kbps
  3. 128kbps
  4. 160kbps
  5. 192kbps
  6. 256kbps
  7. 320kbps
7. Removing audio stream from a media file
If you don’t want to a audio from a video file, use -an flag.
$ ffmpeg -i input.mp4 -an output.mp4
Here, ‘an’ indicates no audio recording.
The above command will undo all audio related flags, because we don’t audio from the input.mp4.
8. Removing video stream from a media file
Similarly, if you don’t want video stream, you could easily remove it from the media file using ‘vn’ flag. vn stands for no video recording. In other words, this command converts the given media file into audio file.
The following command will remove the video from the given media file.
$ ffmpeg -i input.mp4 -vn output.mp3
You can also mention the output file’s bitrate using ‘-ab’ flag as shown in the following example.
$ ffmpeg -i input.mp4 -vn -ab 320 output.mp3
9. Extracting images from the video 
Another useful feature of FFmpeg is we can easily extract images from a video file. This could be very useful, if you want to create a photo album from a video file.
To extract images from a video file, use the following command:
$ ffmpeg -i input.mp4 -r 1 -f image2 image-%2d.png
Here,
  • -r – Set the frame rate. I.e the number of frames to be extracted into images per second. The default value is 25.
  • -f – Indicates the output format i.e image format in our case.
  • image-%2d.png – Indicates how we want to name the extracted images. In this case, the names should start like image-01.png, image-02.png, image-03.png and so on. If you use %3d, then the name of images will start like image-001.png, image-002.png and so on.
10. Cropping videos
It is somewhat similar to change the resolution of the video file. let us say you want to a video with size 300×300. You could do that using command:
$ ffmpeg -i input.mp4 -croptop 100 -cropbottom 100 -cropleft 300 -cropright 300 output.mp4
Please note that cropping videos will affect the quality. Do not do this unless it is necessary.
11. Convert a specific portion of a video
Sometimes, you might want to convert only a specific portion of the video file to different format. Say for example, the following command will convert the first 50 seconds of given video.mp4 file to video.avi format.
$ ffmpeg -i input.mp4  -t 50 output.avi
Here, we specify the the time in seconds. Also, it is possible to specify the time in hh.mm.ss format.
12. Set the aspect ratio to video
You can set the aspect ration to a video file using -aspect flag like below.
$ ffmpeg -i input.mp4 -aspect 16:9 output.mp4
The commonly used aspect ratios are:
  • 16:9
  • 4:3
  • 16:10
  • 5:4
  • 2:21:1
  • 2:35:1
  • 2:39:1
13. Adding poster image to audio files
You can add the poster images to your files, so that the images will be displayed while playing the audio files. This could be useful to host audio files in Video hosting or sharing websites.
$ ffmpeg -loop 1 -i inputimage.jpg -i inputaudio.mp3 -c:v libx264 -c:a aac -strict experimental -b:a 192k -shortest output.mp4
14. Trim a media file using start and stop times

To trim down a video to smaller clip using start and stop times, we can use the following command.
$ ffmpeg -i input.mp4 -ss 00:00:50 -codec copy -t 50 output.mp4
Here,
  • –s – Indicates the starting time of the video clip. In our example, starting time is the 50th second.
  • -t – Indicates the total time duration.
This is very helpful when you want to cut a part from an audio or video file using starting and ending time.
Similarly, we can trim down the audio file like below.
$ ffmpeg -i audio.mp3 -ss 00:01:54 -to 00:06:53 -c copy output.mp3
15. Split video files into multiple parts
Some websites will allow you to upload only a specific size of video. In such cases, you can split the large video files into multiple smaller parts like below.
$ ffmpeg -i input.mp4 -t 00:00:30 -c copy part1.mp4 -ss 00:00:30 -codec copy part2.mp4
Here, -t 00:00:30 indicates a part that is created from the start of the video to the 30th second of video. -ss 00:00:30 shows the starting time stamp for the video. It means that the 2nd part will start from the 30th second and will continue up to the end of the original video file.
16. Joining multiple video parts into one
FFmpeg will also join the multiple video parts and create a single video file.
Create join.txt file that contains the exact paths of the files that you want to join. All files should be same format (same codec). The path name of all files should be mentioned one by one like below.
/home/sk/myvideos/part1.mp4
/home/sk/myvideos/part2.mp4
/home/sk/myvideos/part3.mp4
/home/sk/myvideos/part4.mp4
Now, join all files using command:
$ ffmpeg -f concat -i join.txt -c copy output.mp4
The above command will join part1.mp4, part2.mp4, part3.mp4, and part4,mp4 files into a single file called “output.mp4”.
17. Add subtitles to a video file
We can also add subtitles to a video file using FFmpeg. Download the correct subtitle for your video and add it your video as shown below.
$ fmpeg -i input.mp4 -i subtitle.srt -map 0 -map 1 -c copy -c:v libx264 -crf 23 -preset veryfast output.mp4
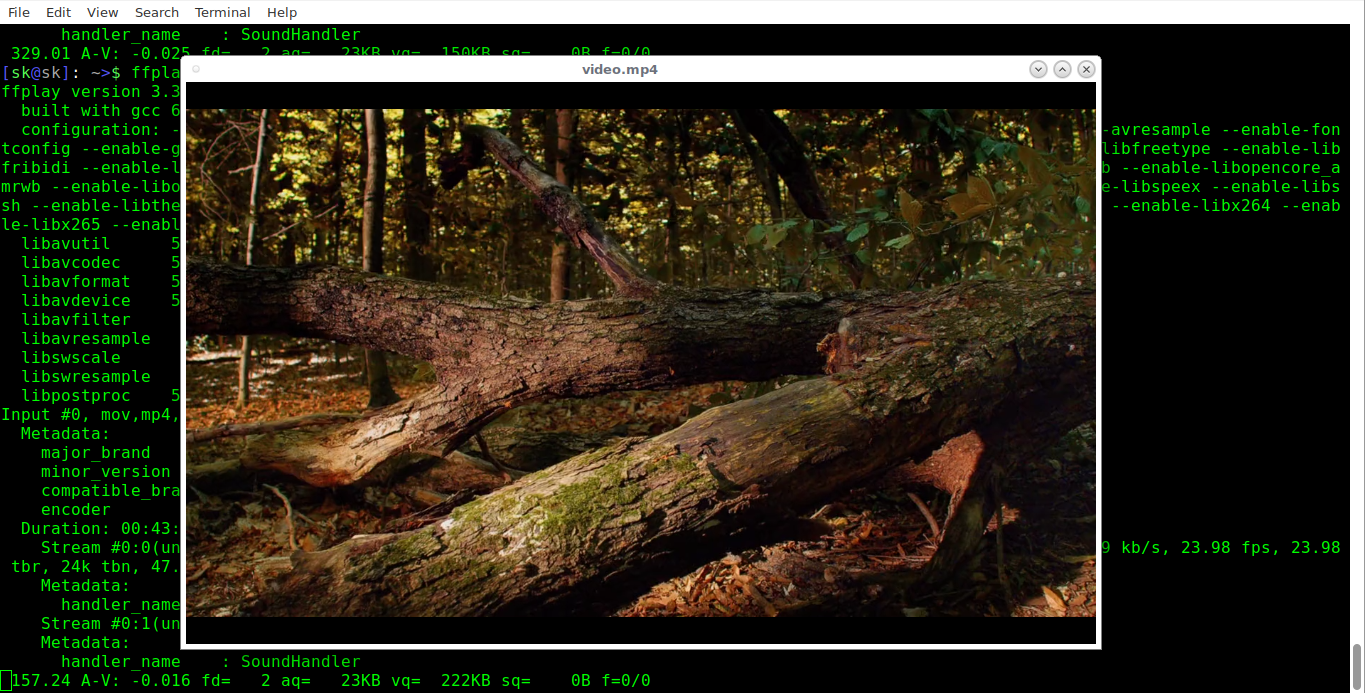
18. Preview or test video or audio files
You might want to preview to verify or test whether the output file has been properly transcoded or not. To do so, you can play it from your Terminal with command:
$ ffplay video.mp4

Similarly, you can test the audio files as shown below.
$ ffplay audio.mp3

19. Increase/decrease video playback speed
FFmpeg allows you to adjust the video playback speed. To increase the video playback speed, run:
$ ffmpeg -i inputvideo.mp4 -vf "setpts=0.5*PTS" outputvideo.mp4
To decrease playback speed, run:
$ ffmpeg -i inputvideo.mp4 -vf "setpts=4.0*PTS" outputvideo.mp4
20. Getting help
In this guide, I have merely covered the most commonly used FFmpeg commands. FFmpeg has a lot more different options to do various advanced functions. To learn more about it, refer the man page.
$ man ffmpeg
Source: https://www.ostechnix.com 

Tuesday, February 25, 2014

Top 5 Free Screen Recording Softwares For Windows

Screen recording can be useful when you need to record a how-to video to help someone learn how to use a program, record a game walkthrough, or prepare for a presentation. Record here means you can create a video of whatever you are doing on your desktop, save the recording as a video file and send it to a friend or upload it on YouTube.
We’ve featured screen capturing tools before, and you know a few ways to take screenshots on your computer. For something more than just a still image, here are 8 free screen recording programs that will help you record every action you make on your Windows desktop.
Free programs at times come with drawbacks or limitations, and watermarks are common in many free screen recording softwares. However, the following list of programs has been tested to not have any watermarks and can export to a file format recognizable to most video editing softwares.

1. Ezvid

Ezvid is a screen recorder program that comes with an in-built video editor where you can split your recordings and add text in between two clips, creating a slideshow effect. There is no way to export the video you recorded. However, you can upload the video to YouTube through the program itself.
Ezvid Program
For gamers, there’s an option to enable ‘Gaming mode’ where it records the windowed mode of your game. The program comes with a few music clips. However if you decide to have no music, it will be replaced with a ‘Silent machine’ which sounds like a small fan from a computer. You can add in other pictures and video clips, as well as add in your voice after you’re done editing your clip.

2. BlueBerry FlashBack Express Recorder

BB (short for BlueBerry) FlashBack Express Recorder lets you use your webcam to record yourself while recording the activities that are happening on your desktop. After you have stopped recording, it creates an FBR file which can be edited with its packaged video editor.
Flashback Express
If you did not enable your webcam, you can skip the video editor program and export it to the AVI file format right away. Otherwise, you can use the software to position and resize your webcam box before exporting it. Although it requires you to register (for a free account) after 30 days of usage, it still provides you with all of its functions before you register.

3. Screenr

Screenr is an interesting way to share a screencast (recording of your screen) online without installing a program on your computer; it requires Java to work. You select an area on your screen which you want to record (max: 5 minutes). All recordings are saved into your account.
Screenr Webpage
After recording you’ll be given a link which you can share. You can also export your video to MP4 or upload it on YouTube.
Screenr also provides a bookmarklet so you can record without going to the website. Register with your Facebook, Twitter, Google, LinkedIn, Yahoo or Windows Live account in order to use Screenr for free.

4. Rylstim Screen Recorder

Rylstim just records your screen after you hit the ‘Start Record’ button. This will be useful for people who do not want to configure anything and just want a basic recorder. This program does not record sound from input devices like a microphone.
Rylstim Program
The only options available determine if you want to show your left or right mouse button clicks in the video. If you enable the mouse click options, a red ripple will appear at your cursor when you left click and a green ripple appears for right clicks. This mouse click ripple effect will only be visible when you view your recording.

5. CamStudio

CamStudio comes equipped with many options to tweak the way it records. There are options to enable or disable your mouse cursor, record sounds from programs or a microphone (or have no sound at all) and the option to enable custom screen annotations.
CamStudio Program
You can also choose to record a particular area on your screen or a program window so that the rest of your desktop isn’t showing on the recording. It can record at different frame rate speeds; for example 1 FPS (frames per second)to create a time lapse video effect, or 30 FPS for a smooth video.

More!

Webinaria

Webinaria is another easy-to-use screen recording software with basic options for your recording needs. It can record your entire screen, a program window or a custom selection. You can choose from 3 frame rate options; 5, 10 and 15 FPS (frames per second).
Webinaria Program
Videos are produced in AVI file format. If you were using Google Chrome before running Webinaria, Google Chrome will be detected as the program window for recording.

DVDVideoSoft Free Screen Video Recorder

This program has a simple user interface carrying 9 icons. The first 4 is for screen capturing, the next 4 handles screen recording and the last icon opens the options of the program. It also exports its video to an AVI file format. What’s good about this program is its automatic file naming options.
DVD Video Soft
It gives you options to include the specific date and time in the filename of your recorded video. Users who need to keep track of many screen recordings back to back will find this automatic file naming option useful.

Krut Computer Recorder

Krut does not require installation but uses Java to run. After downloading, you’ll have a folder where you have to run the ‘KRUT.jar’ file to get started. The capture area and recording frames per second can be set by the user.
Krut Computer Recorder
There is an option called ‘Follow Mouse’ where it captures the area around your mouse, wherever it moves to. When using the ‘Follow Mouse’ feature, you can enable preview mode to see the captured area as you record. This program outputs to three types of files: the WAV file only has the audio recorded, while of the two MOV files; one has no audio and the other has both audio and video of the recording. Source: http://www.hongkiat.com

Friday, June 4, 2010

Oggenc - encode audio into the Ogg Vorbis format

Synopsis
oggenc [ -hrQ ] [ -B raw input sample size ] [ -C raw input number of channels ] [ -R raw input samplerate ] [ -b nominal bitrate ] [ -m minimum bitrate ] [ -M maximum bitrate ] [ -q quality ] [ --resample frequency ] [ --downmix ] [ -s serial ] [ -o output_file ] [ -n pattern ] [ -c extra_comment ] [ -a artist ] [ -t title ] [ -l album ] [ -G genre ] input_files ...

Description

oggenc reads audio data in either raw, WAV, or AIFF format and encodes it into an Ogg Vorbis stream. oggenc may also read audio data from FLAC and Ogg FLAC files depending upon compile-time options. If the input file "-" is specified, audio data is read from stdin and the Vorbis stream is written to stdout unless the -o option is used to redirect the output. By default, disk files are output to Ogg Vorbis files of the same name, with the extension changed to ".ogg". This naming convention can be overridden by the -o option (in the case of one file) or the -n option (in the case of several files). Finally, if none of these are available, the output filename will be the input filename with the extension (that part after the final dot) replaced with ogg, so file.wav will become file.ogg

Options

-h, --help
Show command help.
-v, --version
Show the version number.
-r, --raw
Assume input data is raw little-endian audio data with no header information. If other options are not specified, defaults to 44.1kHz stereo 16 bit. See next three options for how to change this.
-B n, --raw-bits=n
Sets raw mode input sample size in bits. Default is 16.
-C n, --raw-chan=n
Sets raw mode input number of channels. Default is 2.
-R n, --raw-rate=n
Sets raw mode input samplerate. Default is 44100.
--raw-endianness n
Sets raw mode endianness to big endian (1) or little endian (0). Default is little endian.
-Q, --quiet
Quiet mode. No messages are displayed.
-b n, --bitrate=n
Sets target bitrate to n (in kb/s). The encoder will attempt to encode at approximately this bitrate. By default, this remains a VBR encoding. See the --managed option to force a managed bitrate encoding at the selected bitrate.
-m n, --min-bitrate=n
Sets minimum bitrate to n (in kb/s). Enables bitrate management mode (see --managed).
-M n, --max-bitrate=n
Sets maximum bitrate to n (in kb/s). Enables bitrate management mode (see --managed).
--managed
Set bitrate management mode. This turns off the normal VBR encoding, but allows hard or soft bitrate constraints to be enforced by the encoder. This mode is much slower, and may also be lower quality. It is primarily useful for creating files for streaming.
-q n, --quality=n
Sets encoding quality to n, between -1 (very low) and 10 (very high). This is the default mode of operation, with a default quality level of 3. Fractional quality levels such as 2.5 are permitted. Using this option allows the encoder to select an appropriate bitrate based on your desired quality level.
--resample n
Resample input to the given sample rate (in Hz) before encoding. Primarily useful for downsampling for lower-bitrate encoding.
--downmix
Downmix input from stereo to mono (has no effect on non-stereo streams). Useful for lower-bitrate encoding.
--advanced-encode-option optionname=value
Sets an advanced option. See the Advanced Options section for details.
-s, --serial
Forces a specific serial number in the output stream. This is primarily useful for testing.
--discard-comments
Prevents comments in FLAC and Ogg FLAC files from being copied to the output Ogg Vorbis file.
-o output_file, --output=output_file
Write the Ogg Vorbis stream to output_file (only valid if a single input file is specified).
-n pattern, --names=pattern
Produce filenames as this string, with %g, %a, %l, %n, %t, %d replaced by genre, artist, album, track number, title, and date, respectively (see below for specifying these). Also, %% gives a literal %.
-X, --name-remove=s
Remove the specified characters from parameters to the -n format string. This is useful to ensure legal filenames are generated.
-P, --name-replace=s
Replace characters removed by --name-remove with the characters specified. If this string is shorter than the --name-remove list, or is not specified, the extra characters are just removed. The default settings for this option, and the -X option above, are platform specific (and chosen to ensure legal filenames are generated for each platform).
-c comment, --comment comment
Add the string comment as an extra comment. This may be used multiple times, and all instances will be added to each of the input files specified. The argument should be in the form "tag=value".
-a artist, --artist artist
Set the artist comment field in the comments to artist.
-G genre, --genre genre
Set the genre comment field in the comments to genre.
-d date, --date date
Sets the date comment field to the given value. This should be the date of recording.
-N n, --tracknum n
Sets the track number comment field to the given value.
-t title, --title title
Set the track title comment field to title.
-l album, --album album
Set the album comment field to album.

Note that the -a, -t, and -l options can be given multiple times. They will be applied, one to each file, in the order given. If there are fewer album, title, or artist comments given than there are input files, oggenc will reuse the final one for the remaining files, and issue a warning in the case of repeated titles.

Advanced Encoder Options

Oggenc allows you to set a number of advanced encoder options using the --advanced-encode-option option. These are intended for very advanced users only, and should be approached with caution. They may significantly degrade audio quality if misused. Not all these options are currently documented.

lowpass_frequency=N
Set the lowpass frequency to N kHz.
impulse_noisetune=N
Set a noise floor bias N (range from -15. to 0.) for impulse blocks. A negative bias instructs the encoder to pay special attention to the crispness of transients in the encoded audio. The tradeoff for better transient response is a higher bitrate.
bitrate_hard_max=N
Set the allowed bitrate maximum for the encoded file to N bits per second. This bitrate may be exceeded only when there is spare bits in the bit reservoir; if the bit reservoir is exhausted, frames will be held under this value. This setting must be used with --managed to have any effect.
bitrate_hard_min=N
Set the allowed bitrate minimum for the encoded file to N bits per second. This bitrate may be underrun only when the bit reservoir is not full; if the bit reservoir is full, frames will be held over this value; if it impossible to add bits constructively, the frame will be padded with zeroes. This setting must be used with --managed to have any effect.
bit_reservoir_bits=N
Set the total size of the bit reservoir to N bits; the default size of the reservoir is equal to the nominal number of bits coded in one second (eg, a nominal 128kbps file will have a bit reservoir of 128000 bits by default). This option must be used with --managed to have any effect and affects only minimum and maximum bitrate management. Average bitrate encoding with no hard bitrate boundaries does not use a bit reservoir.
bit_reservoir_bias=N
Set the behavior bias of the bit reservoir (range: 0. to 1.). When set closer to 0, the bitrate manager attempts to hoard bits for future use in sudden bitrate increases (biasing toward better transient reproduction). When set closer to 1, the bitrate manager neglects transients in favor using bits for homogenous passages. In the middle, the manager uses a balanced approach. The default setting is .2, thus biasing slightly toward transient reproduction.
bitrate_average=N
Set the average bitrate for the file to N bits per second. When used without hard minimum or maximum limits, this option selects reservoirless Average Bit Rate encoding, where the encoder attempts to perfectly track a desired bitrate, but imposes no strict momentary fluctuation limits. When used along with a minimum or maximum limit, the average bitrate still sets the average overall bitrate of the file, but will work within the bounds set by the bit reservoir. When the min, max and average bitrates are identical, oggenc produces Constant Bit Rate Vorbis data.
bitrate_average_damping=N
Set the reaction time for the average bitrate tracker to N seconds. This number represents the fastest reaction the bitrate tracker is allowed to make to hold the bitrate to the selected average. The faster the reaction time, the less momentary fluctuation in the bitrate but (generally) the lower quality the audio output. The slower the reaction time, the larger the ABR fluctuations, but (generally) the better the audio. When used along with min or max bitrate limits, this option directly affects how deep and how quickly the encoder will dip into its bit reservoir; the higher the number, the more demand on the bit reservoir.

The setting must be greater than zero and the useful range is approximately .05 to 10. The default is .75 seconds.

Examples

Simplest version. Produces output as somefile.ogg:

oggenc somefile.wav

Specifying an output filename:

oggenc somefile.wav -o out.ogg

Specifying a high-quality encoding averaging 256 kbps (but still VBR).

oggenc infile.wav -b 256 out.ogg

Specifying a maximum and average bitrate, and enforcing these.

oggenc infile.wav --managed -b 128 -M 160 out.ogg

Specifying quality rather than bitrate (to a very high quality mode)

oggenc infile.wav -q 6 out.ogg

Downsampling and downmixing to 11 kHz mono before encoding.

oggenc --resample 11025 --downmix infile.wav -q 1 out.ogg

Adding some info about the track:

oggenc somefile.wav -t "The track title" -a "artist who performed this" -l "name of album" -c "OTHERFIELD=contents of some other field not explictly supported"

This encodes the three files, each with the same artist/album tag, but with different title tags on each one. The string given as an argument to -n is used to generate filenames, as shown in the section above. This example gives filenames like "The Tea Party - Touch.ogg":

oggenc -b 192 -a "The Tea Party" -l "Triptych" -t "Touch" track01.wav -t "Underground" track02.wav -t "Great Big Lie" track03.wav -n "%a - %t.ogg"

Encoding from stdin, to stdout (you can also use the various tagging options, like -t, -a, -l, etc.):

oggenc - Source:

Sunday, January 3, 2010

SWFTools

SWFTools is a collection of utilities for working with Adobe Flash files (SWF files). The tool collection includes programs for reading SWF files, combining them, and creating them from other content (like images, sound files, videos or sourcecode). SWFTools is released under the GPL.
The current collection is comprised of the programs detailed below:

* PDF2SWF A PDF to SWF Converter. Generates one frame per page. Enables you to have fully formatted text, including tables, formulas, graphics etc. inside your Flash Movie. It's based on the xpdf PDF parser from Derek B. Noonburg.
* SWFCombine A multi-function tool for inserting SWFs into Wrapper SWFs, contatenating SWFs, stacking SWFs or for basic parameter manipulation (e.g. changing size).
* SWFStrings Scans SWFs for text data.
* SWFDump Prints out various informations about SWFs, like contained images/fonts/sounds, disassembly of contained code as well as cross-reference and bounding box data.
* JPEG2SWF Takes one or more JPEG pictures and generates a SWF slideshow from them. Supports motion estimation compression (h.263) for better compression of video sequences.
* PNG2SWF Like JPEG2SWF, only for PNGs.
* GIF2SWF Converts GIFs to SWF. Also able to handle animated gifs.
* WAV2SWF Converts WAV audio files to SWFs, using the L.A.M.E. MP3 encoder library.
* AVI2SWF Converts AVI animation files to SWF. It supports Flash MX H.263 compression. Some examples can be found at examples.html. (Notice: this tool is not included anymore in the latest version, as ffmpeg or mencoder do a better job nowadays)
* Font2SWF Converts font files (TTF, Type1) to SWF.
* SWFBBox Allows to read out, optimize and readjust SWF bounding boxes.
* SWFC A tool for creating SWF files from simple script files. Includes support for both ActionScript 2.0 as well as ActionScript 3.0.
* SWFExtract Allows to extract Movieclips, Sounds, Images etc. from SWF files.
* AS3Compile A standalone ActionScript 3.0 compiler. Mostly compatible with Flex.

SWFTools has been reported to work on Solaris, Linux (both 32 as well as 64 bit), FreeBSD, OpenBSD, HP-UX, Solaris, MacOS X and Windows 98/ME/2000/XP/Vista. Source: Swfttools